The holidays are coming! As we all know, nuts are featured in many holiday cookies, cakes, pies, and snack bowls. They are not only flavorful but also packed with protein, natural oils, and minerals. However, if you eat a lot of them—as many of us will over the next few months—they can be taxing on the digestive system. If you are already prone to digestive upset or experience more severe digestive symptoms in general, they can be especially challenging.
What is it about nuts that makes them so hard to digest? It’s the phytic acid and enzyme inhibitors, put there by Mother Nature to protect the seed. But no matter what nutty dishes you are preparing for the holidays, applying some easy, traditional cooking techniques to nuts ahead of time will make for a more digestible experience. If you get started now, you will have plenty of nuts ready for all of your holiday recipes.
Purchasing Nuts
Nuts contain oils, and oils go rancid when exposed to heat, light, and oxygen. To avoid rancidity, it is best to purchase nuts right in their shells. But unfortunately, most of us do not have the time or energy to shell several pounds of nuts.
What to do? The next best thing is to purchase whole nuts in small batches or bags and use them right away. If you cannot use them immediately, store them in airtight containers in a cool, dark place until you can. A refrigerator is best, but a cellar would work also. Do not fall for lower cost nut pieces, as pieces go rancid much more quickly than whole nuts.
Bonus! Traditional preparation techniques not only make nuts more digestible but also keep them from going rancid for much longer (several months at room temperature).
Soaking Nuts
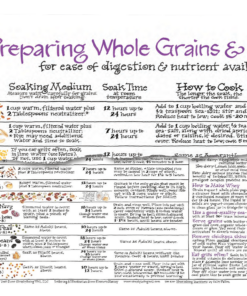
The easiest way to make nuts more digestible is to soak them in warm water with good salt (high mineral, no anti-caking or flow agents). Just follow these simple steps:
- Place nuts in a bowl. For every pound of nuts, add one tablespoon of good salt. Cover by about 2 inches with warm water.
- Cover the bowl with a plate or towel and leave on the counter for 7–12 hours or more. (Cashews are the exception. Do not soak longer than six hours, or they will mold.)
- When ready, drain and dry the nuts. (Rinsing is optional).
Notes on drying the nuts: You may use a dehydrator, or place them in your oven at its lowest temperature until they are dry out and crispy. However, if you are planning to bake with the nuts, do not worry about dehydrating them in order to preserve the enzymes as they will be destroyed when you bake them anyway.
Once your nuts are soaked and dried, use them however you like. Here are a few ideas:
- Serve them as is in a bowl with raisins or cranberries and good salt.
- Grind them in a food processor to make your own “nut flour” to use in any recipes that call for it (cookies, cakes, etc.)
- Make your own nut butter by continuing to process the nuts a bit longer. Add a bit of coconut oil to the food processor to guarantee a creamy nut butter.
- Prepare an unbaked piecrust (recipe below). This is one of my favorite things to do with soaked and dried nuts!
No-Bake Date-Nut Piecrust
This press-in piecrust is best for curd, fresh fruit, or cheesecake fillings. (Cheesecake prepared from homemade yogurt or kefir cheese is best. See my recipe below). This recipe is designed for gluten-free, dairy-free, grain-free, paleo, WAPF, and GAPS diets. Makes one 9×13-inch pan or two 8-inch rounds.
Ingredients
2 cups soaked and crisped nuts (almonds, walnuts, pecans, etc.)
1 cup pitted dates
Butter (for greasing pan)
Instructions
- Process nuts and dates in food processor until thoroughly combined.
- Press into a buttered pan. Add filling as desired and chill.
Yogurt Cheese
Makes 5 cups yogurt cheese. Prepare at least a day in advance for use in the No-Bake Cheesecake below.
Ingredients
3 quarts or more of plain (no fillers) organic, full fat, pastured milk yogurt (or substitute kefir for a tangier filling)
Instructions
- Strain yogurt through a colander lined with several layers of cheesecloth (or you may use a linen napkin or towel) for 8–12 hours or more. The longer you strain, the firmer the cheese, and the more whey you will have.
- Store yogurt cheese in a glass jar in the refrigerator. (Store the whey in a glass jar in the refrigerator for use later in lacto-fermentation or culturing.)
No-Bake Cheesecake
This is a favorite way of mine to use the crust above. Gluten-free, grain-free, WAPF, GAPS, and delicious! Prep ahead by making the no-back crust and yogurt cheese a day or more in advance.
Ingredients
5 cups yogurt cheese (recipe above)
1½ teaspoons vanilla extract
¼ cup maple syrup (or raw honey, melted, if GAPS)
No-Bake Date-Nut Piecrust (recipe above)
For serving: fresh berries, additional chopped nuts, whipped cream
Instructions
- Place yogurt cheese in a large bowl. Whisk in vanilla and sweetener.
- Spoon into prepared crust.
- Cover tightly and chill for 6–8 hours, or until firm.
- To serve, top with any of the suggested garnishes you like.
To learn more about other traditional cooking and prepping methods for making nuts and seeds digestible, including sprouting and fermenting, see “Seeds (Nuts, Seeds, Beans and Grains)” in The Complete Cooking Techniques for the GAPS Diet. To learn more about making your own yogurt or kefir, see “Culturing Dairy” in the same volume.
Happy holidays!
Images from iStock/Shaiith (main), Koval Nadiya (cheesecake). Soaking nuts image from SRP.


