Autumn is just around the corner, and while I look forward to brisk morning walks and nights snuggled up with a good book, I am equally sad when the reality of early darkening skies and frigid weather sets in. I almost instantly yearn (and frequently express my desire) for long warm summer days once again.
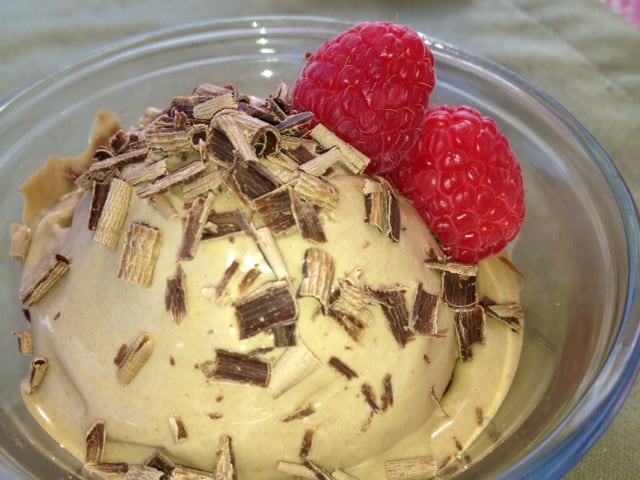
This yummy dessert captures summer in a bowl; that brief relief from the sweltering heat. Yet, somehow, the combination of flavors evokes a warmth that is equally satisfying on a cool evening. Chocolate is often looked at as a winter dessert, and the addition of nourishing barley malt adds a complexity to the flavor profile and reminds me of a heady stout ale.
I use Eden traditional barley malt syrup. They malt their barley the old-fashioned way, starting with soaking and sprouting their grains. This creates a host of digestive enzymes and also reduces the grain’s phytic acid, a compound found to interfere with mineral absorption and create barriers to proper digestion. Plus, their syrup contains only two ingredients: water and organic barley. Other brands use chemicals and artificially produced enzymes to speed up the malting process, technically making a dead food that just happens to taste malt-like.
If you are fortunate enough to have access to quality raw dairy, even your dessert can provide massive nutritional clout. The community of gut-friendly bacteria in this living food is just one of the many benefits it provides. Raw milk—especially from exclusively grass-fed cows—in contrast with its pasteurized sibling does not need anything added to it. Nothing at all. It is a complete food, providing all 8 essential amino acids, all water and fat-soluble vitamins, most minerals, and over 60 different enzymes, all of which have various roles to play, from assisting with digestion to creating antibodies which help ward off harmful microbes.
In the following recipe I have provided a few different variations on the instructions, depending on your situation. I’m confident you will find a method that suits your needs.
Ingredients
Yields 6 cups
1/2 cup cocoa powder
2 1/2 cups heavy cream, preferably raw, if available
1 1/2 cups milk, preferably raw, if available
8 egg yolks, preferably pasture-raised, if available
1/4–1/2 cup honey, coconut sugar, or evaporated cane juice (sucanat/rapadura)
3–6 tablespoons barley malt syrup
2 teaspoons pure vanilla extract
Directions
Fully-Cooked Custard-Based
The fully-cooked custard version is the most traditional method and will produce the creamiest final product, though it does not contain as many nutrients
1. Whisk the cocoa powder with 1 cup of milk in a medium sauce pan and place over medium heat. Add the remaining milk and heavy cream. Bring the mixture to a simmer, stirring occasionally.
2. Gradually pour some of the cream mixture into the egg yolks, whisking to combine, in order to temper the yolks so you don’t get scrambled eggs. Pour egg yolk mixture back into pot, whisking to combine. Heat mixture over low heat, whisking frequently until the mixture thickens and coats the back of a spoon. Add honey and barley malt to taste, keeping in mind that flavors generally aren’t as pronounced upon freezing; go slightly sweeter than you want your final product to be. Add vanilla, and whisk to combine.
3. Pour mixture through a fine-meshed sieve into a clean bowl. Cool at room temperature for about 30 minutes, whisking occasionally, then refrigerate until chilled, about 4–8 hours.
4. Once chilled, prepare your ice cream machine* according to the manufacturer’s instructions. Pour mixture into ice cream machine, and churn until thick and creamy. Serve as is, for soft serve, or freeze an additional couple hours to harden.
*If you don’t have an ice cream machine, you can use the freeze and stir method with great results, though your final product might not be quite as smooth. Simply pour your chilled custard into a baking dish or bowl, and freeze for 45 minutes. Remove from freezer, and vigorously whisk by hand or with a handheld mixer to break up frozen sections. Return to freezer. Check every 30 minutes, vigorously stirring at each interval, until ice cream if of desired consistency, which will likely take about 2–3 hours total.
Partially-Cooked, Custard-Based
Perfect for those with access to raw milk, who want to reap some benefits, but are still uncomfortable with raw eggs
1. Combine 1 1/2 cups milk, 1/2 cup cream, and cocoa powder in a medium sauce pan. Bring mixture to a simmer, stirring occasionally.
2. Gradually pour some of the milk/cream mixture into the egg yolks, whisking to combine, in order to temper the yolks so you don’t get scrambled eggs. Pour egg yolk mixture back into pot, whisking to combine. Heat mixture over low heat, whisking frequently until the mixture thickens and coats the back of a spoon.
3. Chill custard in fridge or freezer until cool. Spoon custard into a blender, along with remaining raw cream. Blend on high to combine. Add honey and barley malt to taste, keeping in mind that flavors generally aren’t as pronounced upon freezing; go slightly sweeter than you want your final product to be. Add vanilla, and whisk to combine.
4. Follow Steps 3 and 4 from the Fully-Cooked recipe above.
100% Raw Version
Ideal for those with access to raw dairy who want to retain all the benefits of both raw milk and raw eggs. Final results will not be quite as silky as custard-based ice cream
1. Pour all ingredients into a blender, and blend on high until completely smooth. Strain through a fine-meshed sieve. Chill for at least 30 minutes before following Step 4 above.
For more on raw milk, check out The Untold Story of Milk
AUTHOR’S NOTE
To choose your organically grown and fresh ingredients wisely, use the following criteria:
·chemical- and hormone-free meat
·wild-caught fish
·pastured-raised, organic eggs
·whole, unrefined grains
·virgin, unrefined, first-press organic oils
·whole-food, unrefined sweeteners
·pure, clean, spring water
·sea salt
·raw and/or cultured milk and cream products


